Showing posts with label recipe. Show all posts

Wednesday, August 13, 2014

How to Make Refrigerator Pickles


These pickles are so yummy and they didn't last more than a couple of days in the fridge because my hubby ate them all up! This year we planted Boston Pickling Cucumbers. We had so many I just had to try pickling my own. These cucumbers are also very delightful by themselves. I'm pretty sure these are okay on my current diet plan.

Ingredient

5 cucumbers
4 cups of white distilled vinegar
5 cups of water
6 cloves of garlic
2 teaspoons of red pepper chili flakes.
*You can also add dill to this recipe. I, however, did not because we didn't have any in the pantry.


1.  Clean and wash your cucumbers. Once they are washed slice them length wise.


2.   Arrange your cucumber slices in your Ball Jar. 

  • Add 1 teaspoon of red pepper flakes per jar
  • Add 3 cloves of garlic to each jar
3.  In a large pan, boil the water and white vinegar. Once it comes to a boil, ladle into each jar. Fill to the very top and put top on. Screw the ring on tightly. 


4.  Turn your jars upside down a couple of times and allow them to sit on the counter for 12 hours. Turn your jars again and allow them to sit upside  down for another 12 hours. 

Enjoy!

 photo bloggersig2.jpg

Wednesday, July 9, 2014

Guest Post~ Food Makeover: Pizza Edition

Hey everyone!! I'm so excited for today's first guest post here on 3 Wittle Birds! My friend Robyn over at Miss GM NO is sharing her Vegan Pizza recipe with you all today! Robyn is passionate about  REAL FOOD and is on a mission to change the food industry! You are going to love her! 
 

Food Makeover: Pizza Edition


Most of us think healthy pizza is just about as mythical as the elusive unicorn, but I am here to tell you you’re wrong!

It CAN be done.


pizza pic
Give your pizza a “BAKE-OVER”!  This vegan, gluten-free pizza is killer…and easy to make. Take a look at my recipe below and give it a try! ;)

Okay before I give you my secret recipe…. let’s get one thing straight.  Take the image of your typical pizza- the smells, the tastes etc and throw it out the window. You have to be open-minded people.  This is NOT going to taste identical to Lou’s, or Giordano’s etc. But just because it doesn’t taste JUST LIKE that, doesn’t mean it taste’s bad.  It is just different.  It’s also different in the fact that it wont pack on the pounds, in fact it will do just the opposite.  So take your pick. :)

MY version of pizza has nearly 1/3  of the calories, 1/2 the fat, 1/20  the saturated fat, 1/100 the cholesterol, less than 1/2  the carbs,  1/4 the sodium and 2 times the fiber as a typical thin crust Domino’s cheese pizza!  Yes- Domino’s Pizza has 100 times more cholesterol you read that right.  Crazy.  Talk about a heart attack in a box…. The ONLY good thing about this junk pizza is the protein but even that is a stretch.  It’s not healthy protein..

Let’s look at the breakdown for both!

Miss GM NO!’s Vegan Pizza ( for 2-3 people)
Ingredients:

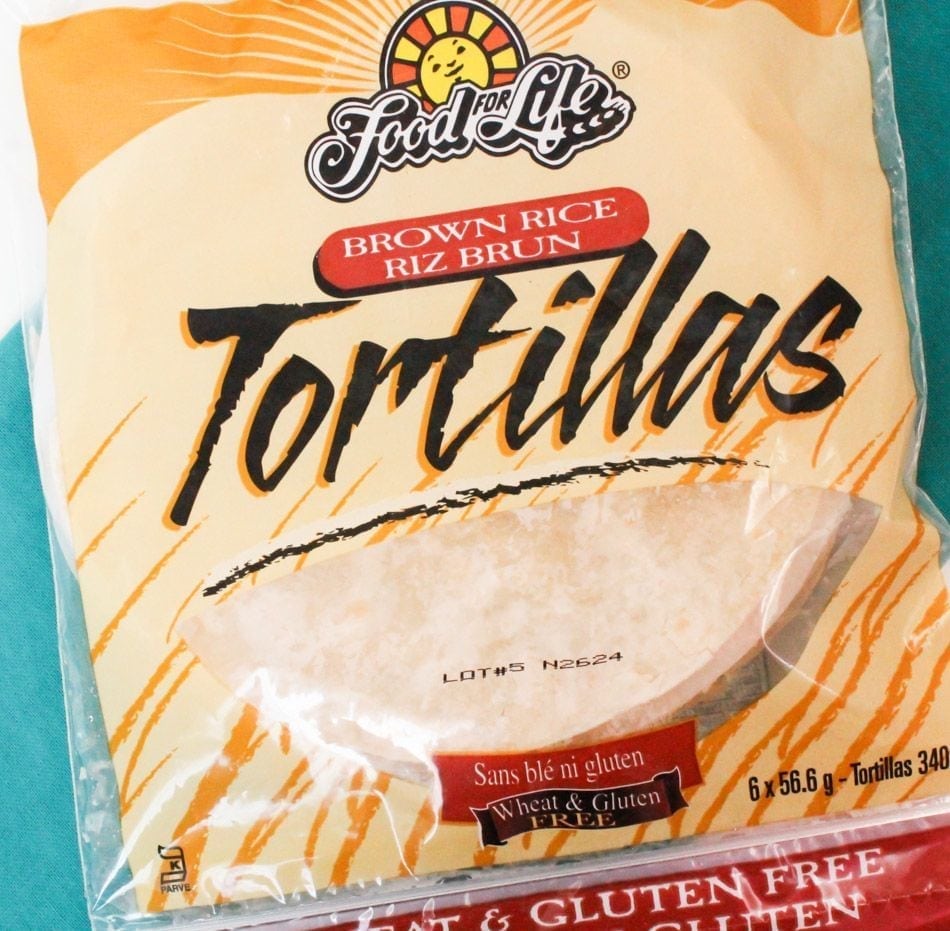
4 Brown Rice Tortillas ( found in the freezer section at places like Whole foods)

1 Cup (approx) of Organic ( no added sugar) Tomato Sauce

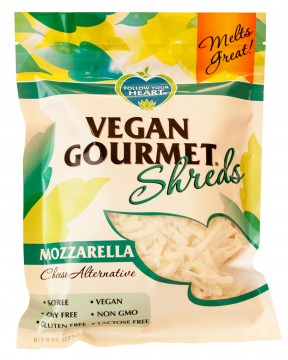
1 Package Vegan Gourmet Mozzarella Cheese

To Taste: Organic Olive Oil, Garlic Salt, Italian Spices

Directions:
Pre-heat oven to 350.  Place each tortilla on a foiled baking sheet and drizzle a bit of olive oil on both sides.  Sprinkle with garlic salt and bake until golden brown ( about 15 mins). You want the crust crisp!

Then,  put about 1/4 C. of the tomato sauce on each pizza and top with about 1/2 cup cheese.  Sprinkle Italian seasonings to your liking on top as well.

Please directly under broiler for about 5 minutes BUT please watch them!  Every oven is different.  **You will need to foil the edges of the pizzas as well because you don’t want them to burn under the broiler.

When they come out the cheese will look perfectly melted but a little more viscous than dairy cheese.  Just let it set for about 10 minutes to firm up before you eat.

Lastly, I like to sprinkle a little red pepper flakes on there for a little heat.  

Then Enjoy!!!  :)

Here is the nutritional info I created as well for one whole pizza. ( I combined all ingredients with the brands listed above and allowing for 1/2 T oil per pizza,  so if you chose different brands yours will vary):

pizza label
Ingredients:

CHEESE:
(vegan, gluten-free, dairy-free, non-gmo)
Filtered Water, Expeller-Pressed Canola Oil, Inulin (Chicory Root Extract), Soy milk Powder (Soybeans), Soy Protein, Agar Agar, Sea Salt, Natural Flavor (Plant Sources), Carrageenan, Lactic Acid (Plant Source).
Contains: Soy

SAUCE:
Organically grown and processed tomato puree, organic onion powder and organic garlic powder.

CRUST:
Ingredients
Brown Rice Flour, Filtered Water, Tapioca Flour, Safflower oil, Rice Bran, Vegetable Gum, Sea Salt.

NOW… let’s compare my pizza to that Domino’s 10 inch thin cheese pizza….

This is for a whole 10 inch personal Domino’s THIN Crust cheese pizza:


NutritionLabel dominos

PIZZA CHEESE:

Part Skim Mozzarella Cheese (Pasteurized Milk, Cultures, Salt, Enzymes), Modified Food Starch, Cellulose (Added To Prevent Caking), Nonfat Milk, Whey Protein Concentrate, Flavors, Sodium Propionate (Added as a Preservative).

SAUCE:
Tomato Puree (Water, Tomato Paste), Sugar, Salt, Spices, Garlic, Soybean Oil, and Citric Acid

THIN CRUST:

Flour (Wheat, Malted Barley), Water, Soybean Oil, Yeast, Salt, Dextrose, Leavening (Sodium Acid Pyrophosphate, Sodium Bicarbonate, Corn Starch, Monocalcium Phosphate), Calcium Propionate (Preservative).

What is all that crap?! Monocalcium Phosphate? Sodium Propionate? Cellulose? Sodium Bicarbonate?   You can easily tell the difference between pizzas and how this fast food is NOT good for our bodies- inside and out.

Give your pizza a “Bake-over” and try this out!! Comment below and let me know what you think!

facebook
Sources: https://order.dominos.com/en/pages/content/nutritional/cal-o-meter.jsp#

Thursday, May 22, 2014

Taking a Time Out and a Recipe

Sometimes you just need to take a time out. There have been things on my mind lately that have been taking over my life and I couldn't find the right words to type. I had a post that I have been staring at for two weeks now and it just never felt right to hit publish. It was about struggling and not being in the right frame of mind and I will leave it at that. I have prayed for patience, understanding and to not feel so resentful. While I don't feel 100% sometimes you just need to push through the block to get out of the rut.

I started a new THING on Monday. We'll call it a thing even though it's a diet. It's the Fast Metabolism Diet. I've had a couple of friends try the 28 day plan and have had some great results. The thing I like about this diet is I don't limit how much I eat and it's all real foods. One of the things I can't have is caffeine, which has taken a toll on me the past two days. I love my morning coffee but I really need this THING to work. I've been a dieter now for 10 years and I still continue to beat my all time max weight record. I'm hoping this will be the lifestyle change of my life, like the last 10 were supposed to be. I've lost 6 pounds in four days! So far so good.

The past couple months, every weekend has been jam packed that I haven't had an opportunity to just sit. I need some relaxation and some rest.That is exactly how I plan on spending the rest of my long weekend. Maybe even a trip to the Zoo!

So as I'm sitting her craving a buttery cheesy something, as this THING doesn't allow dairy, I revert back to one of my older recipes that I am so wishing I could sink my teeth into right now.

Croque Monsieur

This is so delicious. I got this recipe for Ina Garten! She is one of my favorite chefs. I changed the recipe a bit to fit what I had in my kitchen. I also changed the sauce, I felt it wasn't thickening enough.
This is a great brunch recipe and so easy to make!


Ingredients

  • 2 tablespoons unsalted butter
  • 2 tablespoons all-purpose flour
  • 1 cup hot milk
  • 1 teaspoon sea salt
  • 1/2 teaspoon freshly ground black pepper
  • pinch of nutmeg
  • 12 ounces mozzarella, grated (5 1/2 cups)
  • 16 slices white sandwich bread, crusts removed
  • Spicy brown mustard
  • 8 ounces baked Virginia ham, sandwich sliced at your deli.

Directions

Preheat the oven to 400 degrees F.
Melt the butter over low heat in a small saucepan and add the flour all at once, stirring with a wooden spoon for 2 minutes. 
Slowly pour the hot milk into the butter–flour mixture and cook, whisking constantly, until the sauce is thickened. 
Remove the heat  and add the salt, pepper, nutmeg, 1 cup of the Mozzarella and set aside.
Toast the bread, bake on a baking sheet 5 minutes. Turn each slice and bake for another 2 minutes, until toasted.
Lightly brush half the toasted breads with mustard, add two slices of ham to each, and sprinkle with half the remaining Mozzarella. 
Top with another piece of toasted bread. Slather the tops with the cheese sauce, sprinkle with the remaining Mozzarella, and bake the sandwiches for 5 minutes. 
Turn on the broiler and broil for 3 to 5 minutes, or until the topping is bubbly and lightly browned. Serve hot.
 
 Enjoy and have a great weekend!


Sunday, February 9, 2014

Sunday Chili

I made this for a chili Cook-off over the weekend. I got the original recipe here, but adapted it to my liking! My Dad really enjoyed this recipe! He mush have ate if for all 3 meals for 2 days straight:)! It's got a bit of heat to it but I'm in love!! This recipe makes a ton! It's great for Sunday pot lucks or a Chili bar at a fiesta!


What you need....

Meat
2 pounds of ground turkey

Produce
1 jalapeno pepper (minced)
2 red onions (diced)
1 Green Bell Pepper (diced)
1 Red Bell Pepper (diced)
10 cloves of garlic (minced)


Spices
3 teaspoons Garlic poweder
1 tablespoon onion poweder
1 tablespoon Cumin
2 teaspoons Cayenne pepper
3 tablespoons Chili powder
2 tablespoons Paprika
8 dried pasilla chili peppers

4 tablespoons of olive oil

Canned
2 cups of Black beans in the juice
3 cups of Pinto Beans in the juice
2 Cups of Kidney Beans in the juice
3 cups Tomato Sauce
1/3 cup of Tomato Paste
1 cup of low sodium chicken broth

What you do....

First you need to re-hydrate the pasilla chili peppers for about 30 minutes in hot water. Although these are a sweeter hot pepper, don't let that fool you. Wear gloves when handling these peppers, especially after you have rehydrated tehm.

After you have re-hydrated them, take the seeds and gooey stem, and give them a nice chop.

Warm a large pot and heat the oil on high. Once the oil is hot add the onion, peppers, garlic, jalapenos, and pasilla chile peppers. Saute for 8 minutes until you have a nice caramelizing going. You house will be smelling real good at this point!

Gently turn in the ground turkey until browned, about 4 minutes.

Stir in the tomato sauce and tomato paste for about 4 minutes.

Add chicken broth and seasonings. Once combined add the remain black, pinto, and kidney beans in their liquid.

Stir and lower heat. Cook the chili uncovered for at least one hour.

Serve with your favorite garnishes.... cheddar cheese, sour cream, oyster crackers, avocados....

What do you like to garnish your chili with?

Monday, December 2, 2013

Garlic Bread Butter Recipe

This is a recipe for the no fuss, simple cook!

One day I whipped this up and spread it on some fresh bakery italian bread. It was soooo delicious!!! You can use this recipe on a variety of things! You can use it as a breakfast sandwich spread, on potatoes and mashed potatoes!The possibilities are endless!

1 stick of butter at room temp (I use Imperials 1/3 less fat)
2 teaspoons garlic powder
1 tablespoon Parmesan and Romano grated cheese blend (I love Trader Joe's)
1 teaspoon italian seasoning
1/4 teaspoon basil seasoning

mix all the ingredients together and spead on sliced bread!

It's important that the butter is at room temperature to ensure the mixing of ingredients is even. You don't want it too soft or runny either. This will not spread as nicely.

If you're feeling experimental, try switching out the seasonings to create your own butter spread. You can go spicy or sweet!

Monday, November 25, 2013

Mini Pumpkin Cheesecakes


Pumpkin pie always seems to be too much after a heavy Thanksgiving meal. I like a little bit size and this cheesecake recipe is so yummy!

What you need...
2 (8 ounce) packages cream cheese, softened
1/2 cup white sugar
1/2 teaspoon vanilla extract
2 eggs
18  prepared mini graham cracker crust (come in a 6 pack)
1/2 cup pumpkin puree
1/2 teaspoon ground cinnamon
1 pinch ground ginger
1 pinch ground nutmeg
Whipped topping as desired

What you do...
1. Preheat oven to 325 degrees F (165 degrees C).

2. In a large bowl, combine cream cheese, sugar and vanilla. Beat until smooth. Blend in eggs one at a time. Remove 1 cup of batter and spread into bottom of crust; set aside.

3. Add pumpkin, cinnamon, ginger and nutmeg to the remaining batter and stir gently until well blended. Carefully spread over the batter in the crust.

4. Bake in preheated oven for 18 to 23 minutes, or until center is almost set. Allow to cool, then refrigerate for 3 hours or overnight. Cover with whipped topping before serving.
Enjoy!

Tuesday, November 19, 2013

The Skinny on Juicing

We have been in our new home now for about a week and I have barely unpacked!!! I feel the mountains of bags and boxes, which I've realized I am not a very good packer or unpacker, have taken over my life!! One of the first things that I was delighted to dust off was my Breville Juicer!!!

A year ago, I attempted the juice fast by Joe the Juicer. That was the most mind crazing diet I have ever attempted and also the best I have ever felt. Here's the skinny on juicing....


I thought I would share a few of my favorite juice recipes to start your morning right!

Here is one from the website that I absolutely love... Have I told you about my obsession for beet juice. I hate eating beets, but for some reason I love the earthy taste in liquid form!

It's called Bright Pink-A-Licious Juice!!!

By Kelly from Nosh and Nourish!

Ingredients:
1 – 2  small beets (beetroot), peeled
4 carrots
1 orange, peeled
1 sweet potato, peeled
1/2 lemon, peeled  

Directions:
1.) Wash all ingredients well.

2.) Peel the beets, lemon, oranges and sweet potatoes.

3.) Cut the fruits and veggies into pieces small enough to fit through your juicer chute.

4.) Juice all produce and enjoy over ice.

 I hope you enjoy this one as much as I do!!!

P.S. I always recommend using only ORGANIC fruits and vegetables when juicing. It defeats the purpose.

Thursday, July 11, 2013

Caribbean Pound Cake

I'm excited about this one. It's an original!!! One of my favorite things to bake is pound cakes and loaves. They make amazing thank you's and unexpected gifts.

What you need...
2 sticks of unsalted butter-at room temperature
1 1/4 cups sugar
5 large eggs-at room temperature
2 tablespoons honey
2 teaspoons vanilla extract
1/2 teaspoon cinamon
2 cups all purpose flour
1 teaspoon salt- sea salt
1/2 teaspoon baking powder
1 1/2 cups pineapple tidbits

What you do...
  • Preheat oven to 350 degrees. Grease and flour a loaf pan.
  • In a bowl with electric mixer on medium speed, cream the butter and sugar until light about 3 mins.
  • In a separate bowl, add in egg, honey, vanilla, cinnamon. Don't combine. Add egg mixture, one egg at a time, to your creamed butter. Use medium to a low speed. 
  • In a seperate bowl combine flour, baking powder, salt and mix. Slowly add flour to wet mixture on low speed. With rubber spatula, scrap down the sides of bowl. Combine until just about mixed. 
  • Use spatula to fold in pineapple tidbits. 
  • Pour into greased loaf pan and bake for 50 to 60 minutess. You can use the toothpick checker system to tell when ready. Let it cool.
This pound cake makes a great addition to a sundae, too!
Enjoy!

Wednesday, March 6, 2013

Coconut Chicken Tenders

Studio Movie Grill Coconut Chicken Tenders
Have any of you heard of the new movie theater Studio Movie Grill? It's a super modern, amazingly CLEAN movie theater that serves food and (alcoholic) beverages. My husband and I have been so many times because we found this amazing deal on groupon for 1 movie and free drink for $6!! This post is not a paid advertisement... I was not compensated for this post... just so you know. I just wanted to share the awesomeness of this place. It's a pretty great date night for the parents who have to fit a dinner and show in a couple hours!

One of my favorite items on the menu (and there are many) are their Coconut Chicken Tenders!!! OMG these things are so crunchy and so delicous! Let's not forget the option of sweet potato fries to go along!

So I tried to recreate this recipe on my own and I have to say... I almost nailed it!
We made these yummy bad boys last week and they hit the spot! I had to make them on two separate occasions to get the egg wash right. Here you go and I hope you all enjoy!

I  like to explain by stations... These are the three stations (in order) that you will have your chicken tenders go through. I bought a bag of frozen chicken tenders and actually cut them in half. This helped get them cook all the way through with out burning the crust. I would recommend completely thawing out the chicken tenders first!

Flour station...
Drop your tenders in a plate of flour. This takes off excess moisture on the chicken tenders and allows the egg wash and crust to stick better.


Egg wash Station.....
1 egg and 1/2 cup milk whisked together.
Dip your floured tenders in the egg wash and fully coat.

Crumb Station....
Dip your coated tenders in the crumb bowl and coat evenly.

50/50 of coconut flakes and panko bread crumbs. I like to chop the coconut flakes into smaller flakes but the choice is yours. I generally use 1 cup of each.
Seasonings.....
1/2 tablespoon Garlic powder
1/2 teaspoon salt
1/2 teaspoon pepper
1/2 teaspoon sugar
Mix all ingredients in the Crumb Station together.


Cook...
There are a couple methods for cooking your chicken tenders. You can bake them in the oven or pan fry them.... I pan fry then for the golden crispy crust. I usually do three tenders in a large fry pan with a nice coat of vegetable oil on the bottom. I turn the heat about half way. It takes about 1 minute per side. Test the first couple you do to make sure they are cooked all the way through. You may need to adjust the heat or oil level.

This recipe comes pretty close to the one I had at studio movie grill!!

Monday, March 26, 2012

Waffle Brownies!!


Has anyone else ever tried this? The first time I did I was inspired by Rachel Ray. It must have been over two years ago. Since then, I have become obsessed. Why? Because they don't take as long as normal brownies to cook!!!

I used a regular packaged brownie mix from the store and prepare as normal. I get my waffle iron nice and hot and butter it up and bake like a regular waffle! I usually only eat the crunchy part of the brownie anyways that's why these are so perfect. The entire "brownie" is crunchy!! 

This is really great as a sundae, or topped with fruit for a brunch! I have to admit I even served this as a legitimate breakfast. Yes, very shameful. It's just as bad as Nutella on toast for breakfast!